


Simple Steps to Grow Anise Microgreens
 Milosh Potikj
| November 14, 2023 | 9 MIN READ
Milosh Potikj
| November 14, 2023 | 9 MIN READ
Who's up for a little DIY gardening project? How about growing your very own anise microgreens right at home? These little bundles of joy not only fill your plate, but they also fill your body with amazing nutrients.
Fun fact – they even help your body absorb more goodness from other foods! So, whether you're a green-thumbed garden wizard or still figuring out how not to turn your basil plant brown, this blog post is here to help. We'll walk you through everything - from spreading those tiny seeds to celebrating your first homegrown harvest.
We will reveal all the secrets of anise microgreens, their super benefits, and top tricks for making sure your indoor garden flourishes. Are you ready to roll up your sleeves and dive into the world of anise microgreens?
History of Anise Microgreens

Anise, known scientifically as Pimpinella Anisum, is a flowering plant native to the Eastern Mediterranean region and Southwest Asia. It has a long and rich history dating back thousands of years.
- The ancient Egyptians, Greeks, and Romans recognized anise for its aromatic and culinary qualities.
- The plant's popularity later spread to the Middle East and Europe, where it was frequently used in traditional medicine and cooking.
- The anise plant was brought to the Americas by early European settlers and has since found a place in various cuisines and medicinal practices worldwide.
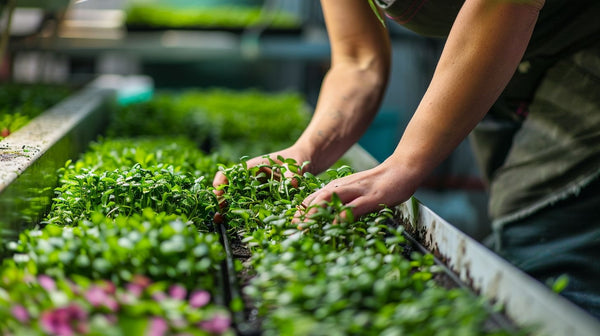
- In recent years, urban farming has elevated the status of anise - not as a mature plant but as a microgreen. Anise microgreens are harvested just a few weeks after germination once they have developed their first true leaves.
Related: Grow Fava Bean Microgreens
Nutritional Benefits
| Nutritional Component | Benefits |
| Vitamins A, C, and E | Boosts the immune system, promotes eye health, and aids in skin repair |
| Calcium | Promotes bone health |
| Iron | Essential for hemoglobin formation |
| Fiber | Helps maintain a healthy digestive system |
| Flavonoids | Antioxidant properties, help reduce inflammation |
| Protein | Essential for muscle growth and repair |
Getting Started: Tools and Materials

Now that we've covered Anise microgreens' historical significance and nutritional power, it's time to prepare for growing your own. To get started, we need to gather the necessary garden tools and materials. These include microgreen seeds, the right tray, a good light source, and other essential items.
Microgreen Seeds
Anise microgreen seeds are the starting point of our gardening journey. These are available in various sizes, from small packets for home gardeners to larger quantities for commercial production. It's important to source high-quality seeds for the best germination rate and healthy growth.
Opt for organic seeds whenever possible to ensure your greens are free from harmful pesticides and chemicals. A general rule of thumb is to spread about 10-15 grams of seeds per tray, ensuring they are distributed evenly. Remember, not all seeds will germinate, so don't worry if it seems like a lot.
Tray Selection and Preparation
Choosing the right tray for growing your microgreens is crucial. Here are a few pointers to keep in mind:
- Microgreen trays come in various sizes and depths. A shallow tray without holes is a popular choice for growing microgreens because it allows for a thin layer of soil and retains water effectively.
- If your tray doesn't have built-in drainage, you can also use a tray with holes. Just place it inside a tray without holes to catch any excess water.
- The size of the tray you choose will depend on how much produce you want. A standard 10-20-row seedling tray can produce a substantial amount of microgreens.
- Before sowing your seeds, clean your tray thoroughly to prevent disease and pest infestation.
Once you choose the right tray, prepare it for the seeds. This involves:
- Lining the bottom of the tray with a layer of well-draining soil about an inch deep.
- Ensure the soil is evenly spread and leveled, ready for you to broadcast your seeds.
- Moisten the soil with a spray bottle to create a damp environment for the seeds.
After preparing the tray, you can smoothly move on to the next step: sowing your anise microgreen seeds.
Light Source

Proper lighting is crucial for the healthy growth of your Anise microgreens. They need ample light to photosynthesize and grow, but the intensity and duration of light exposure can impact their overall health and vigor. Here are a few guidelines to keep in mind:
- Microgreens prefer a bright, indirect light source. Direct sunlight can be too intense and may lead to wilting or burning.
- Use a grow light if adequate natural light is not available. LED lights or fluorescent lights work well for microgreens. Place the light source about 2-3 inches above the tray and adjust as the plants grow.
- Aim for about 12-16 hours of light exposure per day. Too much light can stress the plants, while too little can result in leggy and weak microgreens.
By carefully managing the light conditions, you can ensure your Anise microgreens develop healthy green leaves and strong stems.
Read More: Grow Endive Microgreens
Growing Medium
The growing medium plays a significant role in microgreen cultivation. It provides the necessary nutrients and water retention for seed germination and growth. While there are several options, well-draining soil is often the best choice for beginners due to its ease of use and provision of essential nutrients.
- A high-quality potting mix, preferably organic, is ideal. Avoid garden soil as it can be too heavy and may contain diseases or pests detrimental to your delicate microgreens.
- The soil should be spread evenly in your tray, about an inch deep. This depth provides enough room for roots to grow while maintaining a damp environment necessary for germination.
- Pre-moisten the soil before sowing your seeds. Use a spray bottle to lightly mist the soil until it's damp but not waterlogged.
- If you prefer a soil-less method, you can use a hydroponics or a micro mat. These mediums provide a clean and efficient way to grow microgreens, although they may not offer the same nutrient levels as soil-based mediums.
Whichever medium you choose, remember that the key to successful germination is maintaining a consistently moist environment for your seeds. This fosters the ideal conditions for your Anise microgreens to flourish.
Other Necessary Materials
- Humidity Dome: A humidity dome helps maintain the surrounding moisture levels, especially in the crucial initial stages of germination. This tool is beneficial if you're growing microgreens in drier environments where water can evaporate quickly from the soil.
- Sharp Knife: Harvesting your microgreens requires a sharp knife. It ensures a clean cut without damaging the plant and helps maintain the freshness of your greens for a longer period. Always sanitize the knife before use to prevent any potential contamination.
- Fertilizer: While anise microgreens can get many of their needed nutrients from the soil, a light application of a balanced organic fertilizer can give them an extra boost. Look for a fertilizer with a balanced ratio of nitrogen, phosphorous, and potassium, such as a 20-10-20 mix.
- Container for Harvested Microgreens: Once you have harvested your microgreens, you’ll need a clean, breathable container to store them. A container with small ventilation holes is ideal because it allows airflow, keeping your microgreens fresh.
- Spray Bottle: A spray bottle is used to moisten the soil during the early stages of growth lightly. It helps achieve a damp but not waterlogged soil condition, which is perfect for germination.
Read More: Guide to Grow Parsley Microgreens
Growing Process

Once you have your tray set up and your materials gathered, it's time to sow your seeds and start the wonderful journey of growing Anise microgreens. The process involves several steps, each of which contributes to the successful growth of your greens.
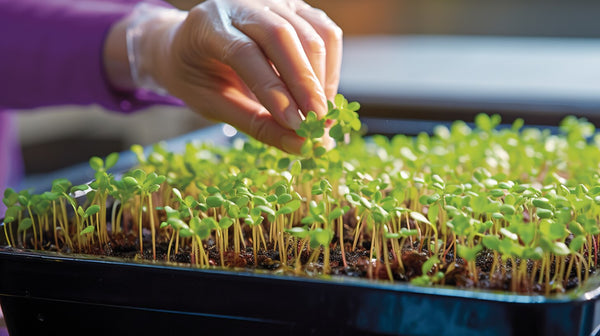
Seeding
Seeding is the first step in your journey of growing microgreens. Here's how to do it:
- Evenly distribute your seeds across the surface of the soil or growing medium in your tray. Aim for a density of about 10-15 grams of seeds per square inch.
- Gently press the seeds into the soil with your hand or a small board. This helps the seeds make good contact with the soil.
- Mist the seeds lightly with a spray bottle.
Germination Process
After seeding, germination follows. This is when the seeds start to sprout.
- Cover the seeded tray with a humidity dome or another tray. This creates a dark, humid environment that encourages germination.
- Keep the soil moist but not waterlogged. Use your spray bottle to mist the soil daily.
- You should see sprouting in about 4-7 days.
Caring for Your Anise Microgreens

As your microgreens start to grow, they'll need some care to help them thrive:
- Keep the growing medium moist by misting it with water daily. However, avoid overwatering as this can lead to mold.
- Remove the cover once your microgreens have germinated, and expose them to light.
- Ensure the microgreens get 12-16 hours of light per day.
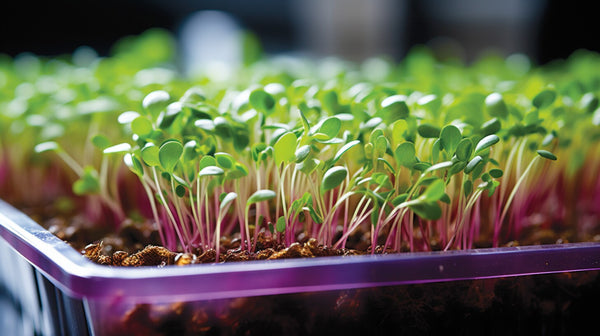
Understanding the Growth Stage
Understanding the growth stages of your Anise microgreens can help you care for them more effectively:
- Germination: This is when the seeds start to sprout. It usually happens 4-7 days after seeding.
- Leaf Development: The microgreens will develop their first set of leaves after germination. These are known as "cotyledon" leaves.
- True Leaves Stage: This is the final growth stage. The microgreens develop their "true" or adult leaves and are usually ready to harvest.
Read More: Guide to Grow Lemon Balm Microgreens
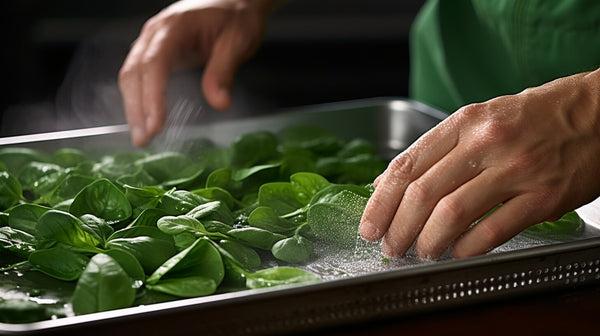
Harvesting Your Anise Microgreens

Harvesting your Anise microgreens is a gratifying stage, signifying that you are about to enjoy the fruits of your labor. It is crucial to know when and how to harvest your microgreens and store them for optimal shelf life.
- When to Harvest: Anise microgreens should be harvested when they've developed their first true leaves, typically 2-3 weeks after planting. They should be about 1-3 inches tall and display a vibrant green color.
- How to Harvest: Use a sharp, sanitized knife to cut the microgreens above the soil line. It's best to do this in the morning when the leaves are freshest. Harvest only what you need now, leaving the rest to continue growing.
- Shelf Life and Storage: Gently rinse the microgreens and pat them dry after harvesting. Store them in a breathable container in the refrigerator. They should remain fresh for about 5-7 days. To extend their shelf life, storing them with a damp paper towel is recommended to maintain humidity.
Enjoying Your Anise Microgreens

Anise microgreens, with their distinct, mildly sweet licorice flavor, offer a unique taste profile that can add depth and complexity to various dishes. Being aromatic microgreens, their intense flavors can be used to enhance salads, garnish seafood dishes, or add a fresh punch to sandwiches. However, as with all flavors, the key is balance. It's important not to overpower the other elements of your dish.
- Safety Precautions
While microgreens are generally safe and healthy to consume, it's a good practice to wash them thoroughly before use to remove any potential residues. Furthermore, if you have any allergies, especially to plants in the Apiaceae family (including anise), it's advisable to proceed cautiously, as microgreens may cause similar allergic reactions.
Always store your microgreens properly for safety and to maintain their nutritional benefits. To avoid any risk of foodborne illnesses, refrain from consuming microgreens that have been stored for too long or have visible signs of spoilage.
Read More: Guide to Grow Shiso Microgreens
Frequently Asked Questions
How do you grow microgreens step by step?
Growing microgreens involves several steps. First, evenly distribute your seeds across the soil surface or growing medium in your tray. Next, cover the seeded tray to create a dark, humid environment that encourages germination. Lastly, remove the cover once your microgreens have germinated and exposed to light.
How do you grow anise at home?
Growing anise at home involves planting anise seeds in well-draining soil, providing ample sunlight, and maintaining a steady watering schedule. Ensure the plant is in a sunny area, as anise thrives in plenty of light. Regular watering helps the plant grow, but be careful not to saturate the soil overly.
How do you process anise?
Processing anise involves harvesting the mature plant, drying it, and collecting the seeds. The seeds can be used directly in cooking or planting in the next growing season.
What is the secret to growing microgreens?
The secret to growing microgreens is the right amount of light, water, and a nutrient-rich growing medium. A consistent environment with these elements will produce lush, flavorful, and nutrient-packed microgreens.
Conclusion
In conclusion, growing your own Anise microgreens at home is a rewarding experience. With the right care and conditions, you can enjoy fresh, flavorful microgreens that enhance your culinary creations and provide a wealth of nutritional benefits.
Whether you're a seasoned gardener or a budding green thumb, with patience, practice, and the right materials from Canada Grow Supplies, you can cultivate a thriving microgreen garden right in your home.