


Simple Steps to Grow Borage Microgreens
 Milosh Potikj
| November 17, 2023 | 9 MIN READ
Milosh Potikj
| November 17, 2023 | 9 MIN READ
Looking to add a fresh twist to your daily greens? Why not try growing borage microgreens at home? It's easier than you think, and these little greens pack a punch with their unique cucumber-like taste. Plus, they're a fantastic source of vitamins A and C.
Guess what? You don’t need to be a gardening pro to get started. With just a few easy steps, you'll be on your way to harvesting your very own borage microgreens in no time.
In this blog post, we're going to show you exactly how to do it. If you've been thinking about dabbling in your own edible garden, stick around. You're about to discover how awesome (and tasty!) growing borage microgreens can be. Let's get growing!
What You Will Need

The following items will be crucial for the successful growth of your borage microgreens:
- Borage Microgreens Seeds: These seeds are relatively small and have a black color, which may be unfamiliar if you're new to the world of microgreens. They are the foundation for your borage microgreens. Purchase high-quality seeds to ensure optimal growth and health of your microgreens.
- A Microgreens Tray: Microgreens trays are specifically designed for germinating and growing microgreens such as borage. They commonly have drainage holes, which prevent over-watering and promote healthy root development.
- Grow Lights: If your microgreens' setup lacks exposure to direct natural sunlight, grow lights are a must-have. These lights provide the necessary light spectrum for your microgreens to photosynthesize and grow.
- Water: Borage microgreens, like all plants, need water. Cold water is typically fine for watering your microgreens. However, the water level should be monitored carefully to ensure the soil remains moist but not waterlogged.
- Paper Towels: Use paper towels to cover the seeds in the initial stages of growth. This helps retain moisture and aids in a higher germination rate.
Having each of these items ready will prepare you to start growing your own nutritious borage microgreens at home.
Read More: Grow Shiso Microgreens
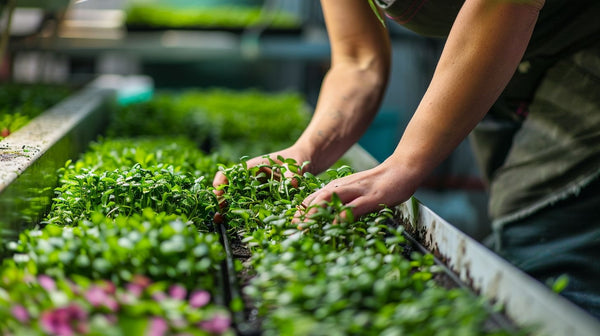
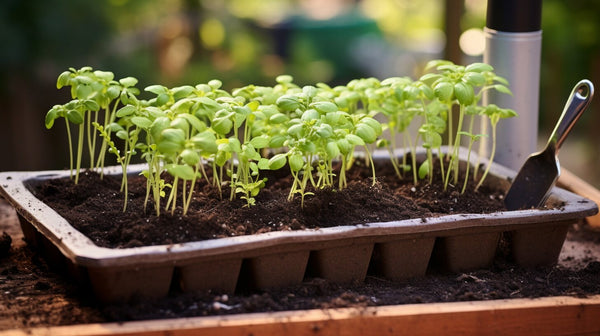
Planting Your Borage Microgreens

These easy-to-follow steps will take you from planting the borage seeds to reaping a harvest of nutrient-dense greens. Even if you are new to microgreens, don't worry; we've got you covered.
Step 1: Preparing the Tray
First, you will need to prepare your microgreen tray for planting. This process involves ensuring that your tray is clean and free from any residual dirt or previous plant material that might inhibit the growth of your borage microgreens.
Once your tray is clean, you'll want to fill it with a suitable growing medium. A soil-based medium is a great choice for borage microgreens because it provides the right balance of drainage and water retention.
Make sure to distribute the soil evenly throughout the tray and water it lightly to make it moist but not overly waterlogged.
Your tray is now ready for the borage seeds to be sown. Remember, a well-prepared tray is the first step towards successfully harvesting borage microgreens.
Step 2: Sowing the Borage Seeds

Start the sowing process by evenly spreading your borage seeds across the moist soil in the tray. Borage seeds are relatively small and black, requiring only a thin layer of soil on top.
Here are some points to consider:
- Use 10-15 grams of borage seeds for a standard 10x20 inch tray. The key is to achieve a seed density that is high enough for a lush harvest but not so high that it risks mold growth.
- After the seeds are sown, lightly cover them with soil. While seeds need some light for germination, too much can dry them out and hinder growth.
- Once the seeds are sown and covered with soil, place another tray or a blackout dome on top. This creates a dark, humid environment that helps kickstart the germination process.
- Be sure to keep the soil moist during the germination process.
By following these steps, you'll set your borage microgreens up for success from day one!
Read More: Grow Lemon Balm Microgreens
Step 3: Covering with a Paper Towel
The next step involves covering the sown seeds with a paper towel. This step might seem simple, but it plays a critical role in creating a conducive environment for the seeds to germinate.
Place a moist paper towel over the seeds. Ensure it is uniformly wet but not dripping. The wet paper towel provides a dark, moist environment that mimics the conditions seeds would find in natural soil, making it perfect for germination. Subsequently, cover the tray with a blackout dome or another tray to retain humidity and create darkness, which aids in the germination process.
Check the tray every day to ensure the paper towel remains moist. If it's drying out, lightly spray it with water. The goal is to keep the paper towel damp but not overly wet, as too much water can cause the seeds to rot.
Continuing this process, you will soon see tiny green leaves appearing, signaling the germination of your borage microgreens! Remember, this delicate stage of growth requires some patience and gentle care.
Read More: Grow Parsley Microgreens
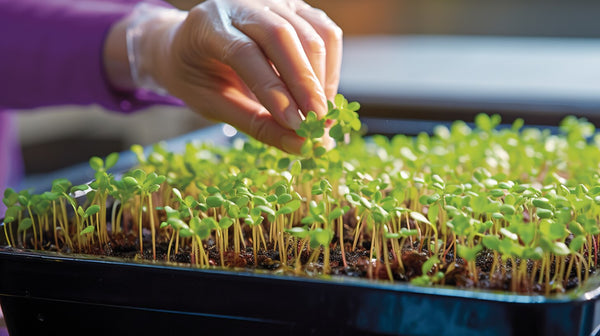
Step 4: Watering the Seeds

Watering is an essential part of growing borage microgreens. Once germination has started and you start to see small sprouts, remove the paper towel and the cover. This is the time when your microgreens need plenty of water and light. Here's how you should water them:
- Start watering your borage microgreens gently, using a watering can or a spray bottle. Ensure that the water is spread evenly across the soil surface. Avoid watering directly onto the sprouts to prevent damaging them.
- Always use cold water for watering, as it helps maintain a favorable temperature for the microgreens.
- Make sure that the soil remains consistently moist but not waterlogged. Borage microgreens need water to grow, but too much water can lead to problems such as mold growth.
- Check the water level daily. If you notice the soil drying out, water the microgreens. Conversely, if you see water accumulating in your tray, drain the excess water to prevent waterlogging.
Remember, the key to successful watering is balancing the water level. Too little water and the plants will dry out; too much and they may drown or develop mold. Proper watering will lead to healthy, vigorous borage microgreens!
Read More: Grow Endive Microgreens
Caring for Your Borage Microgreens

After ensuring that the watering needs of your borage microgreens are met, the care does not end there. Here are some more ways to ensure optimal growth:
- Providing Ample Light: As your borage microgreens start to sprout, they will need plenty of light to continue growing. If you are growing your microgreens indoors, you may need to use grow lights, especially in areas where natural sunlight is limited. Ensure that the plants are getting 12-16 hours of light per day.
- Watering Regularly: It is not just during the initial stages that your microgreens need water. Regular watering is crucial throughout the growth period of the plants. Keep the soil moist but take care not to overwater. Overwatering can lead to root rot and other plant diseases.
- Checking for Mold Growth: Regularly inspect your microgreens for any signs of mold growth. Mold can rapidly spread and ruin your entire tray of borage microgreens. If you notice any signs of mold, it is best to discard the affected part immediately. To prevent mold growth, ensure there's adequate air circulation around your growing area, and avoid overwatering the plants.
Taking care of these factors will help ensure a healthy, vibrant harvest of borage microgreens.
Read More: Grow With Remo Nutrients
When and How to Harvest Borage Microgreens

Identifying the Right Time to Harvest
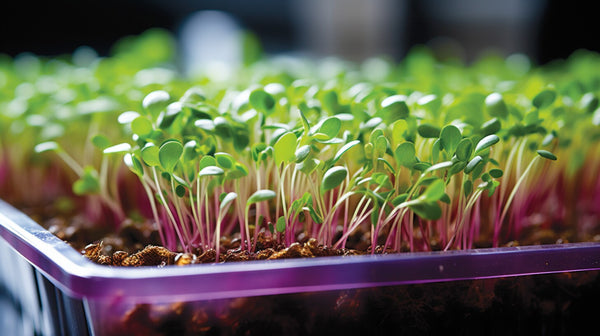
Knowing when to harvest your borage microgreens is crucial for maximizing their flavor and nutritional benefits. The best time is generally when the plants develop their first true leaves, which is typically 10-15 days after planting.
At this stage, the microgreens are about 2-3 inches tall, and the true leaves (the second set of leaves that appear after the seed leaves) have just started to form. The borage microgreens will have a deep green color and a fresh, cucumber-like flavor that is perfect for salads and garnishes.
The Harvesting Process
Harvesting borage microgreens is a straightforward process. Here's how to do it:
- Prepare a clean container: Before you begin harvesting, prepare a clean, airtight container to store your harvested microgreens. This will help keep them fresh for longer.
- Use clean, sharp scissors: Using clean, sharp scissors, cut the microgreens just above the soil level. Make sure not to pull the microgreens, as this can disturb the roots of the remaining plants.
- Harvest in small batches: It's best to harvest your microgreens in small batches, as they can wilt quickly after cutting. Always harvest only as much as you need at the time.
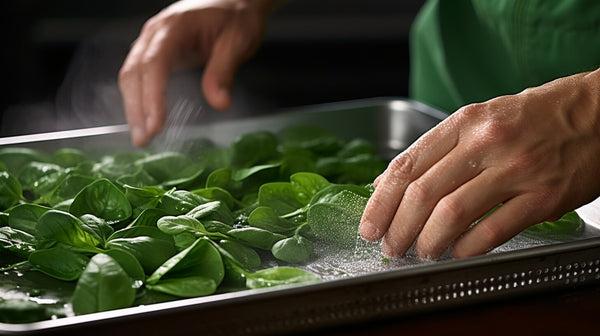
- Wash and dry: After harvesting, wash the microgreens gently under cold water to remove any soil particles, then pat dry with a clean towel or use a salad spinner to remove excess water.
Remember, borage microgreens are delicate, so handle them carefully during harvesting to preserve their flavor and nutritional properties. Enjoy your harvest in salads, as garnishes, or in drinks to add a fresh, cucumber-like flavor and a nutritional punch to your dishes!Read More: Guide to Gardening Microbes
The Health Benefits of Borage Microgreens

- Nutritional Benefits: Borage microgreens are packed with vitamins and minerals. They contain high amounts of Vitamin C, Vitamin A, and Calcium. Additionally, they are rich in antioxidant compounds such as gamma-linolenic acid, which can help in protecting the body against oxidative stress.
- Digestive Health: These microgreens can aid in digestion. The high fiber content in borage microgreens helps in maintaining a healthy digestive system by promoting regular bowel movements and preventing constipation.
- Heart Health: Borage microgreens are heart-friendly. They contain Omega-6 fatty acids that play a crucial role in heart health by reducing the levels of harmful cholesterol in the body, thus reducing the risk of heart disease.
- Skin Health: Borage microgreens are beneficial for the skin, too. The gamma-linolenic acid present in these microgreens aids in maintaining skin health by reducing inflammation and promoting skin repair and regeneration.
- Eye Health: The Vitamin A content in borage microgreens contributes to maintaining good eye health. This vitamin protects the eyes against age-related decline and certain eye conditions like macular degeneration.
Read More: Grow Oregano Microgreens
Adding Borage Microgreens to Your Diet

- Salads: Borage microgreens make a delicious addition to salads. Their fresh flavor pairs well with various green leaves and salad ingredients. You can toss them in your favorite salad or use them as a garnish.
- Smoothies: Consider adding borage microgreens to your smoothies for a nutrient-dense boost. They blend well with fruits and vegetables and have a refreshingly mild cucumber flavor.
- Sandwiches and Wraps: Sprinkle a handful of borage microgreens on your sandwich or wrap for an extra crunch and a boost of color and flavor.
- Garnish: Borage microgreens are beautiful and flavorful, perfect for soups, stews, and other dishes. Their vibrant green color and unique texture can enhance the visual appeal of any dish.
Read More: Grow Turnip Microgreens
Frequently Asked Questions
How do you grow borage microgreens?
Growing borage microgreens is quite straightforward. You start by spreading the borage seeds evenly on a tray filled with a layer of soil or a germination pad. Keep the tray in a location with indirect sunlight, and make sure to keep the soil moist until the seeds germinate. Once the seedlings start to sprout, move the tray to a location with more light exposure and continue to water regularly.
How do you grow microgreens step by step?
Growing microgreens involves several key steps. Start by sowing your selected seeds densely on the surface of a growing medium, such as soil or a germination mat. Water the seeds lightly and cover the tray with a lid or another tray to create a dark, humid environment conducive to germination.
Do borage seeds need to be soaked before planting?
Borage seeds do not require soaking before planting. Directly sow the seeds into the soil or germination mat, ensuring they are evenly spread. The high germination rate of borage seeds usually ensures a healthy crop of microgreens.
What is the seeding rate for borage microgreen?
The seeding rate for borage microgreens typically ranges between 15-20 grams per 10x20 tray. This rate ensures a densely packed tray of microgreens, which is ideal for achieving the highest yields. Remember to distribute the seeds evenly across the tray to promote optimal growth.
Conclusion
We hope this guide has equipped you with all the knowledge you need to start growing and enjoying borage microgreens at home. Start growing your microgreens today and experience their unique flavor and numerous health benefits firsthand!