


Simple Steps to Grow Fava Bean Microgreens
 Milosh Potikj
| November 13, 2023 | 9 MIN READ
Milosh Potikj
| November 13, 2023 | 9 MIN READ
Gardening enthusiasts and culinary hobbyists alike, it's time to step up your growing game! If you're looking for a new way to add some excitement to your kitchen garden or nutrient-dense superfoods to your daily meals, fava bean microgreens are the perfect addition.
Not only do they contain an impressive amount of vitamins and minerals, but they can also be harvested in as little as two weeks.
In this blog post, we will cover all the steps needed to mass produce these finger-licking greens in no time. So get ready to spruce up salads, sandwiches, and more with the power of Fava Bean Microgreens!
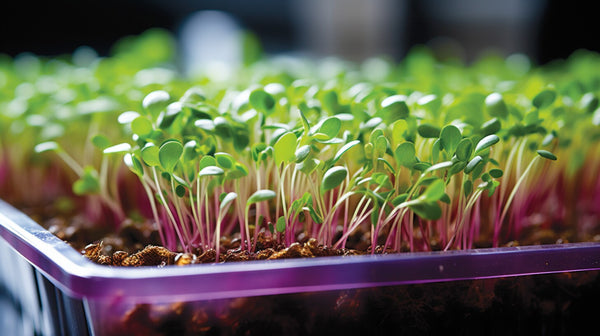
What are Fava Bean Microgreens?
Fava Bean Microgreens, also known as broad bean shoots, are young, tender greens harvested from fava bean plants when they are just a few inches tall. They are a popular choice for microgreens due to their robust flavor and nutritional benefits. Bursting with vitamins A, C, and B, along with essential minerals, they provide a significant nutritional punch.
Their vibrant green color and fresh taste make them a popular addition to various recipes. Being easy to grow at home, they offer a fun and rewarding gardening experience for the whole family!
Why Grow Fava Bean Microgreens?

Growing Fava Bean Microgreens can prove to be an enriching experience for a myriad of reasons:
- Easy to Cultivate: Fava Bean Microgreens are simple to grow and don't require a green thumb. Even if you're a novice gardener, you can successfully cultivate these microgreens at home with minimal effort.
- Fast Growth: These microgreens sprout quickly and can be ready to harvest within a week or two, making them an instant gratification for your gardening efforts.
- Nutritional Powerhouse: Packed with vitamins and minerals, Fava Bean Microgreens are a great way to boost your daily nutritional intake. They are rich in vitamins A, C, and B, as well as essential minerals.
- Culinary Versatility: Their fresh flavor and vibrant green color make Fava Bean Microgreens a wonderful addition to salads, sandwiches, and various other dishes. They add a crunch and a unique flavor to your meals.
- Educational for Kids: Growing these microgreens can be a fantastic way to introduce children to gardening. It's a fun, hands-on activity that can also educate them about the importance of healthy eating.
So why wait? Start your journey with Fava Bean Microgreens today, and watch your kitchen garden transform!
Step-by-Step Guide to Growing Fava Bean Microgreens

Now that we've covered what Fava Bean Microgreens are and why they are such a fantastic choice for your kitchen garden, it's time to get our (green) thumbs dirty! In the following section, we will walk you through the step-by-step process of growing these nutritious and delicious microgreens right in the comfort of your own home. Don't worry, it's simpler than you think! Let's get started, shall we?
Step 1: Gather Your Materials
Before embarking on your planting journey, it's crucial to have all the necessary materials at hand. Here's what you'll need to grow Fava Bean Microgreens:
- Fava Bean Seeds: These are the primary ingredients for your project. Look for organic seeds, if possible, available at your local garden store or online.
- Growing Tray: Choose a tray with adequate drainage to avoid waterlogged seeds.
- Soil: Fava beans flourish in well-draining soil. Opt for an organic potting mix.
- Watering Can: A watering can with a gentle shower is perfect for watering your tiny sprouts without displacing them.
- Sunlight/ Grow light: Fava bean microgreens require plenty of light. A grow light can work wonders if you don't have a sunny windowsill.
- Spray bottle: A spray bottle is handy to mist your microgreens and keep them moist.
- Plastic Wrap or Lid: This will help create a greenhouse effect during germination.
Ensure that you have all these items before you start planting. Preparation is key to a smooth and successful planting process!
Step 2: Planting the Seeds
Start by filling your tray with the organic potting mix. Ensure that the soil is level and about an inch below the rim of your tray. Moisten the soil with a watering can, ensuring that it is damp but not waterlogged.
Next, scatter your fava bean seeds evenly over the surface of the soil. There's no need to worry about planting depth with microgreens; the seeds only need to be on the surface of the soil. Aim for a density that allows the seeds to touch but still have a little wiggle room.
After you've spread your seeds, gently press them into the soil using the flat side of a clean trowel or your hand. This will ensure good contact between the seeds and the soil, aiding in germination.
Then, lightly mist the seeds with a spray bottle. This is a vital step as it prevents the seeds from drying out and promotes successful germination.
Finally, cover the tray with a lid or plastic wrap to create a mini greenhouse. The enclosed environment helps maintain a consistent temperature and moisture level, which is essential for seed germination.
Remember, patience is key at this stage. The seeds can take anywhere from a couple of days to a week to germinate. Make sure to keep the soil moist throughout this period by lightly misting it once or twice a day. Very soon, you'll see your fava bean microgreens beginning to sprout!
Related: Guide to Grow Shiso Microgreens.
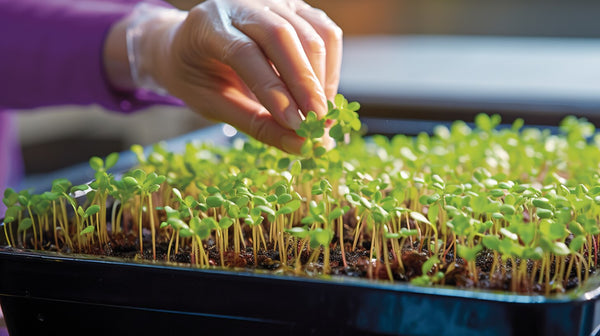
Step 3: Caring for Your Microgreens

Once your seeds start to germinate, remove the lid or plastic wrap. At this stage, your microgreens will need plenty of sunlight or light from a grow lamp to aid in their growth. Aim for about 4-8 hours of light per day, but avoid direct sunlight, which can scorch the tender plants.
Make sure the growing medium remains moist but not waterlogged. A spray bottle is perfect for this purpose; it provides a gentle shower that won't wash away or damage the tiny sprouts. Water your microgreens once or twice a day, depending on the humidity in your home.
Ensure good ventilation to prevent mold and fungus. If possible, use a fan on a low setting to circulate the air.
Keep an eye out for any diseases or pests. If you see any leaves turning yellow or notice tiny bugs, take action immediately. In most cases, removing the infected plants and improving ventilation can solve the problem.
Remember, the healthier your plants, the more nutritious and tasty your harvest will be. With the right care and conditions, your fava bean microgreens will be ready to harvest in just one to two weeks!
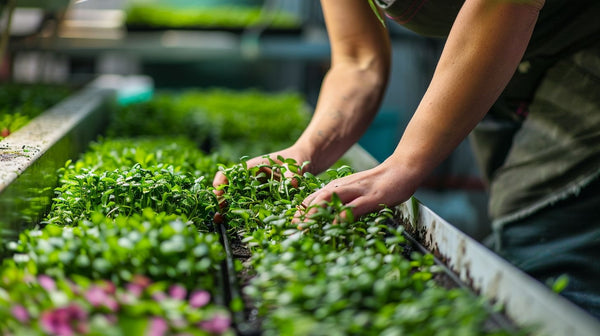
Step 4: Harvesting Your Microgreens

Harvesting your Fava Bean Microgreens is the final and most exciting step in the growing process. Your microgreens are ready to harvest when they are around 2-3 inches tall and have developed their first set of true leaves.
To harvest, simply hold a handful of microgreens at the base, just above the soil, and use a sharp, clean pair of scissors to cut the stems. Take caution not to pull the plants from the soil, as this could disturb the roots of neighboring plants.
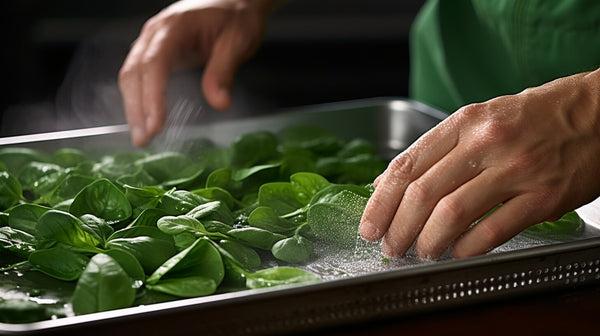
Remember, it's better to harvest too early than too late. Once harvested, gently rinse your microgreens in cold water, pat dry, and they are ready to enjoy. Remember to consume them fresh to maximize their nutritional benefits and taste.
Your microgreens can be stored in a sealed container in the fridge for a few days, but be sure to consume them as soon as possible. Happy harvesting!
Read more: Guide to Grow Lemon Balm Microgreens.
Common Issues While Growing Fava Bean Microgreens and How to Solve Them

Growing Fava Bean Microgreens can encounter a few common issues but don't worry, we've got you covered with solutions to address them:
- Poor Germination: This could be due to old seeds, inadequate moisture, or incorrect temperatures. Ensure you're using fresh seeds, keep the soil consistently moist, and maintain an optimal temperature range between 60-75°F (16-24°C).
- Mold or Fungus: Too much moisture or lack of air circulation often causes this. Make sure the soil is damp but not waterlogged. Use a fan to improve air circulation, but keep it on a low setting to avoid drying out the plants.
- Leggy or Pale Microgreens: This is often a sign of insufficient light. Simply increase the exposure to light. Using artificial lighting, like a grow light, can help ensure your plants receive adequate light, especially in darker months.
- Yellow Leaves: This could be a nutrient deficiency. If you're growing your microgreens in a soilless medium, consider using a liquid organic fertilizer to supplement your nutrient intake.
Remember, each batch of microgreens can be a learning experience. Don't be discouraged by these issues; instead, see them as opportunities to learn and improve. With time and practice, you'll be a pro at growing Fava Bean Microgreens!
Related: Guide to Grow Parsley Microgreens.
Health Benefits of Consuming Fava Bean Microgreens
| High in Nutrients | Fava bean microgreens are loaded with essential nutrients like vitamins A, C, E, K and a range of B vitamins. They also contain high levels of minerals such as calcium, iron, magnesium, and potassium. |
| Rich in Protein | Fava beans are well-known for their high protein content, making their microgreens a great source of plant-based protein. |
| Good for Heart | With their high dietary fiber, low fat, and zero cholesterol, fava bean microgreens can contribute to heart health by reducing the risk of heart disease. |
| Helps in Digestion | The high fiber content in fava bean microgreens aids in promoting a healthy digestive system and preventing constipation. |
| Strengthen Immune System | They are packed with antioxidants and vitamins that can boost your immune system and help fight off illness. |
| Aids in Bone Health | Fava bean microgreens contain good amounts of calcium, an essential mineral that contributes to bone health and strength. |
Incorporating Fava Bean Microgreens into Your Meals

Fava Bean Microgreens are a versatile ingredient that can add a nutritional boost and a fresh, green touch to a variety of dishes. Here are some inspiring ideas for incorporating them into your meals:
- Salads: Sprinkle some Fava Bean Microgreens onto your salads for a fresh, earthy flavor and a vibrant color. They pair well with a variety of vegetables and dressings, making them an excellent choice for any salad.
- Sandwiches and Wraps: Add a handful of these microgreens to your sandwiches or wraps. They provide a nice crunch and a subtle, nutty flavor that complements most sandwich fillings.
- Soups and Stews: Scatter some microgreens on top of your soup or stew just before serving. Not only will this add a pop of color, but it also adds a different texture and freshness to your warm dishes.
- Smoothies: Looking for a nutritional boost for your smoothie? Add a handful of Fava Bean Microgreens! They blend well and enrich your smoothies with their health benefits.
- Dips and Hummus: Incorporate some finely chopped microgreens into your dips, salsas, or hummus for an added nutritional punch and a touch of green.
- Garnish: Use these microgreens as an attractive garnish on any dish. They'll make your meals restaurant-worthy in an instant!
Remember, while Fava Bean Microgreens are a powerhouse of nutrients, they are best enjoyed raw. Cooking can diminish their nutritional value and affect their delicate flavors. So, go ahead and experiment with adding these tiny greens to your meals. Your body and palate will thank you!
Frequently Asked Questions
How do you grow microgreens step by step?
Growing microgreens involves a few key steps. Start by choosing a shallow tray with drainage holes, fill it with a layer of quality potting soil, and evenly distribute your seeds across the surface. Cover the seeds with a thin layer of soil, mist them with water, and then place the tray in a location with good light exposure.
How do you grow fava bean sprouts?
Growing fava bean sprouts involves a similar process to growing microgreens. However, instead of using soil and a tray, you simply soak the beans in water until they sprout, which usually takes several days.
How do you grow microgreen beans?
To grow microgreen beans, follow the same initial steps as for other microgreens: select a shallow tray, fill it with quality potting soil, and scatter the bean seeds evenly. After that, cover the seeds with a light layer of soil and mist them with water, ensuring they have good light exposure for optimal growth.
Are fava beans easy to grow?
Yes, fava beans are relatively easy to grow and are often recommended for beginners. They are hardy plants that can thrive in a variety of soil conditions and climates, making them a great choice for first-time gardeners or those new to growing microgreens.
Conclusion
Growing and consuming Fava Bean Microgreens is an excellent way to enhance your diet and green thumb skills. Not only do these microgreens provide a myriad of health benefits, but they also add a delightful, fresh flavor to numerous dishes.
Their easy cultivation process makes them a perfect entry point for beginners in gardening or those new to the world of microgreens. With a little time, attention, and care, you can enjoy the fruits of your labor in the form of nutrient-dense, flavorful Fava Bean Microgreens. Happy growing!