


Simple Steps to Grow Turnip Microgreens
 Milosh Potikj
| November 15, 2023 | 9 MIN READ
Milosh Potikj
| November 15, 2023 | 9 MIN READ
Growing your food from the comfort of your home can be incredibly rewarding, especially when you can learn how to grow nutrient-rich microgreens. Not only will your garden offer a steady supply of fresh produce year-round, but it also provides an opportunity to work with nature and develop green practices that are both organic and sustainable.
If you're looking for ways to diversify your edible garden, turnip microgreens are among the easiest vegetables to grow and bring plenty of health benefits!
In this blog post, we'll take an in-depth look at turnip microgreens – including their anatomy & nutritional profile, the best soil/climates for growing them, and tips on germination & harvesting – so you can confidently begin nurturing these tiny greens in the comfort of your own home.
Overview of Turnip Microgreens
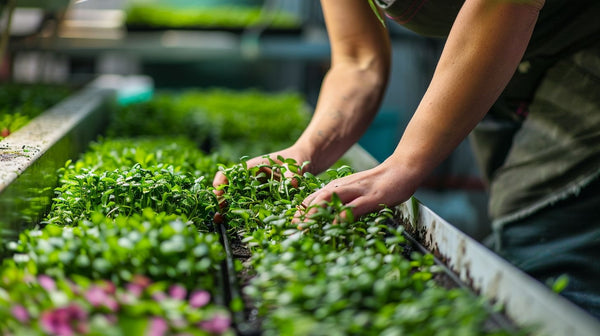
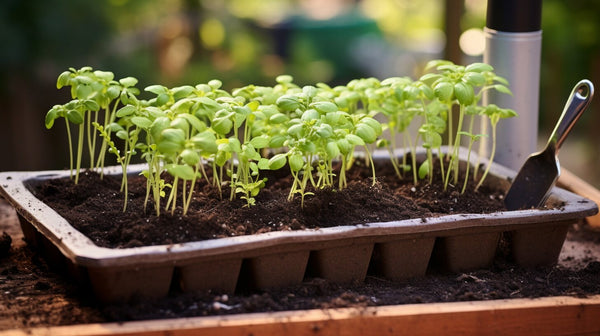
Turnip microgreens are mature turnip plants' young, tender shoots, typically harvested when they’re about 2-3 inches tall. These greens are characterized by their bulbous roots, white stems, and vibrant green leaves. Some common turnip types for microgreen cultivation include 'Tokyo Turnip' and 'Just Right.'
- Roots: The roots of turnip microgreens are often short and bulbous, similar to a mature turnip, but on a much smaller scale.
- Stems: The stems of turnip microgreens are white and provide a crunchy texture when consumed.
- Leaves: The leaves of these microgreens are a vibrant green with a slightly sweet and mild flavor.
Preparing for Planting

Before we delve into the planting process, it's important to understand some key factors that influence the growth and health of turnip microgreens. From the choice of soil and tray to the right light and temperature conditions, every aspect significantly ensures successful germination and a bountiful harvest. Let's explore these elements in detail.
Read More: Grow Lemon Balm Microgreens
Choosing the Right Type of Turnip Seed
Choosing the right variety of turnip seeds is crucial for growing robust and flavorful microgreens. While several types of turnip seeds are available, 'Tokyo Turnip' and 'Just Right' are commonly recommended for microgreen cultivation due to their consistent germination rates and pleasant flavor profiles. Always opt for non-GMO seeds from reputable garden centers to ensure quality growth when purchasing seeds.
Understanding Soil Needs for Turnip Microgreens

Turnip microgreens thrive in a well-draining soil mix that is kept consistently moist. Compacted soils or those that drain slowly can lead to waterlogged conditions, increasing the risk of root rot diseases. Here are some key aspects of ideal soil for turnip microgreens:
- Texture: The soil should be light and fluffy to allow the delicate roots to penetrate easily.
- Nutrient Content: A rich potting mix with organic matter will provide turnip microgreens with the essential nutrients for healthy growth.
- pH Level: Turnip microgreens prefer slightly acidic soil with a pH level between 6.0 and 7.0. Adjusting your soil pH, if needed, can be done with the help of certain amendments available at garden centers.
- Moisture: While the soil should be kept moist, avoiding overwatering is crucial. A solid tray with drainage holes can help maintain the correct water level.
Ideal Temperatures and Light Conditions for Turnip Microgreens
Turnip microgreens are cool-weather crops that prefer temperatures between 15°C and 20°C for optimal growth. During the early growth stage, they require a blackout period of about 4-8 days. This simulates the conditions under the soil surface and encourages strong stem growth. After the blackout period, turnip microgreens need light for photosynthesis.
An ideal light source can be a sunny windowsill or an artificial grow light, providing at least 4-6 hours of light daily. These lights should be positioned close to the trays, 1-2 inches above the microgreens, to prevent the seedlings from becoming "leggy" or overly tall and thin.
Read More: Grow Parsley Microgreens
The Planting Process

After preparing the right conditions for growing turnip microgreens, we can now delve into the planting process. This step-by-step guide will take you from sowing your turnip seeds to enjoying your homegrown microgreens.
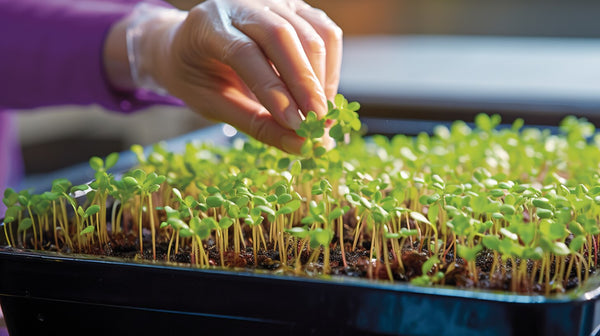
Step-by-Step Guide to Germination
To achieve successful germination with turnip microgreens, follow these simple steps:
- Preparation: Start by filling your chosen tray with your prepared soil mix. Spread the turnip seeds evenly over the soil's surface. Aim for a density that allows each seed to touch another seed.
- Covering the Seeds: Lightly cover the seeds with a thin layer of additional soil. This mimics the natural germination conditions of turnip seeds and protects them from light, which can disrupt germination.
- Moistening the Seeds: Using a spray bottle, moisten the soil thoroughly. The soil should be damp but not waterlogged.
- Blackout Period: Place the tray in a dark, cool location for the blackout period, which lasts for about 4-8 days. During this time, ensure the soil stays moist but not soggy.
- Germination: After the blackout period, move the tray to a location with indirect light and cooler temperatures. Soon, you'll see the first signs of germination - little white stems pushing up the soil.
Using the Right Tray for Planting

Choosing the right tray for planting turnip microgreens is crucial. Here are a few things to keep in mind:
- Size: The size of the tray will depend on how many microgreens you intend to grow. Standard 10x20 trays are commonly used.
- Depth: Trays should be at least 1-2 inches deep to accommodate the roots and the soil.
- Drainage: Ensure the tray has drainage holes. Proper drainage is essential to prevent waterlogging and the diseases it can cause, such as root rot.
- Material: Trays made from durable, food-safe materials are the best choice. They should also be easy to clean, as hygiene is paramount when growing microgreens.
Different types of trays can be used for planting turnip microgreens. Here are some of them:
| 10x20 Tray | This standard-size tray is commonly used by microgreen growers. It provides ample room for seeds to spread out and grow. |
| 8x8 Tray | A smaller, square tray like this can be ideal for home gardeners who wish to grow smaller batches of microgreens. |
| Stackable Trays | These trays are designed to stack neatly on each other – a valuable feature during the blackout period when you can stack another tray on top to block out light. |
| Tray with Drainage Holes | Drainage is key to preventing waterlogging and subsequent disease in your crop. Trays with built-in drainage holes help maintain optimal moisture levels. |
| Solid Tray |
A solid tray, when used in conjunction with another tray with drainage holes, can create a reservoir where excess water can drain off, preventing soggy soil conditions. |
| Microgreens Tray | This is a tray designed specifically for growing microgreens. It often has grooves or a patterned bottom to help funnel water and prevent waterlogging. |
Ensuring Proper Soil Moisture and Water Level

Proper soil moisture is critical when growing turnip microgreens. Here are a few tips to maintain the correct water levels:
- Watering Method: Watering with a spray bottle ensures a gentle, even spread of water that won't disrupt the seeds or seedlings.
- Moisture Level: The soil should always be moist but never waterlogged. If the soil is too dry, the seeds won't germinate; if it's too wet, the seeds could rot.
- Drainage: Ensure your tray has adequate drainage holes to prevent water from accumulating at the bottom. This helps keep the overall water level balanced and promotes healthy root growth.
Managing the Growth of Turnip Microgreens

Understanding the growth stages and implementing appropriate measures at each stage can greatly enhance the success of your turnip microgreen cultivation journey.
- The Blackout Period and its Importance: In the early growth stage, turnip microgreens require a blackout period of about 4-8 days. This period recreates the conditions under the soil surface, encouraging stronger stem growth. Keeping trays in a cool, dark location during this time ensures the best growth environment for your microgreens.
- Managing Light Exposure: After the blackout period, your turnip microgreens need light for photosynthesis. Whether natural light from a sunny windowsill or artificial light from a grow light, ensure that your microgreens receive at least 4-6 hours of light each day. Position the light source close to the trays, preferably 1-2 inches above, to prevent the seedlings from growing too tall and thin.
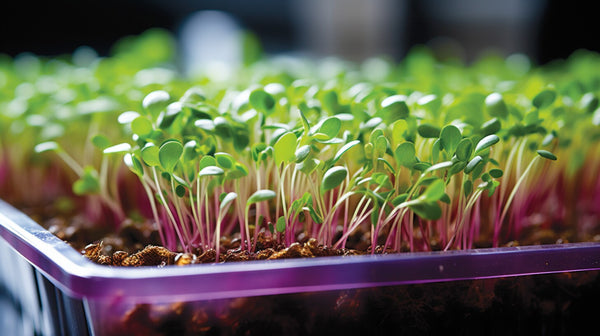
- Understanding Growth Stages: Recognizing the different growth stages can help you cater to the needs of the turnip microgreens more efficiently. From the germination stage, where you'll see little white stems pushing up the soil, to the seedling stage, where the first "true leaves" appear, each growth stage requires specific care. Regularly monitoring and adjusting light, water, and temperature conditions will help ensure healthy growth throughout these stages.
Read More: Grow Fava Bean Microgreens
Harvesting Your Turnip Microgreens

- Knowing When to Harvest
Turnip microgreens are usually ready to harvest when they are about 1-2 inches tall, typically occurring between 10-14 days after planting. The main visual indicator that your microgreens are ready for harvesting is the appearance of the first pair of "true leaves." These look different from the seed leaves and signal that the plant has moved past the seedling stage and is maturing.
- How to Harvest Turnips without Damaging the Plant
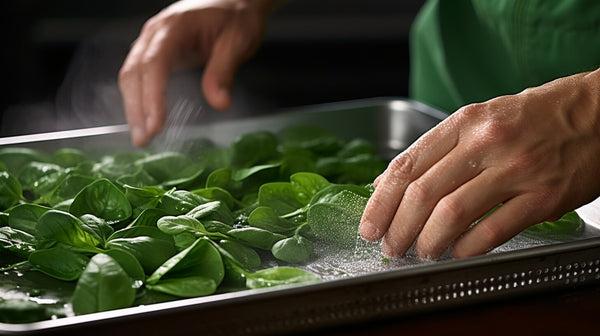
To harvest your turnip microgreens without causing damage, you’ll need a sharp, clean pair of scissors. Begin by gently holding the stems near the base. Cut the stems just above the soil level, taking care not to pull or disturb the soil. Please do not wash the microgreens until ready to use them, as moisture can make them spoil faster.
- Post-Harvest Care and Increasing Shelf Life
After harvesting, if you're not using the turnip microgreens immediately, store them in a container with a lid in the refrigerator. Place a paper towel in the container to absorb any excess moisture to extend their shelf life. Properly stored, your turnip microgreens can stay fresh for up to a week. Remember always to wash your microgreens just before use rather than before storage.
Read More: Grow Anise Microgreens
Nutritional Profile of Turnip Microgreens

Turnip microgreens are a powerhouse of nutrients. They’re packed with vital vitamins and minerals supporting overall health and wellness.
- Vitamin A: This essential vitamin supports eye health and boosts the immune system.
- Vitamin C: Known for its immune-boosting properties, vitamin C also promotes skin health and aids in iron absorption.
- Fiber: Turnip microgreens are an excellent source of dietary fiber, which aids in digestion and helps maintain a healthy weight.
- Calcium and Potassium: These minerals are essential for bone health, muscle function, and a healthy heart.
Read More: Grow Shiso Microgreens
The Health Benefits of Turnip Microgreens
Growing and consuming turnip microgreens offer an array of health benefits. Here are some of the key benefits these nutritious greens provide:
- Boost Immune System: Packed with vitamin C, turnip microgreens can help boost your immune system and defend against common diseases.
- Supports Digestive Health: The high fiber content in turnip microgreens aids in digestion and promotes gut health.
- Promotes Heart Health: The potassium found in turnip microgreens contributes to maintaining a healthy heart by regulating blood pressure.
- Bone Health: The calcium content in turnip microgreens helps maintain strong bones and teeth.
Frequently Asked Questions
How do you grow microgreens step by step?
Growing microgreens involves a few simple steps. Start by spreading a thin layer of soil in a tray with drainage holes. Then, evenly scatter your chosen microgreen seeds, such as turnip seeds, and lightly cover them with additional soil. Lastly, ensure the soil stays moist (not soaked) and place the tray in a location with adequate light.
Can you grow turnip microgreens?
You can grow turnip microgreens! They're a nutritious and versatile vegetable that can be grown indoors all year round. They usually take about 10-14 days to grow and are relatively easy to care for, making them a great choice for beginner and experienced gardeners.
How do you start turnip greens?
Starting turnip greens involves preparing a well-draining soil mix in a suitable tray, scattering the seeds evenly across the soil, and lightly covering them with a thin layer of soil. Maintaining consistent moisture and providing sufficient light for the greens to flourish is crucial.
What is the planting method for turnips?
Planting turnips start with preparing a garden bed with well-draining soil. Scatter the turnip seeds over the soil surface and cover them lightly with a thin layer of soil. Maintain consistent moisture and expose the plant to sufficient light for optimal growth.